This is an update combining multiple posts I've made on Airsoft Retreat. So if things look/are structured a little odd that is why.
Original Post- 2/22/11Hello everybody. I'm an avid lover of Kalashnikov rifles, and I've also always carried a fascination for bull-pup rifles. So for a while now I've toyed around with the idea of building a bull-pup ak conversion. I've studied multiple designs, both airsoft and real steel, but none of the airsoft conversions previously done really appealed to me (not to mention the Uncompany kit was $500+ when it was available), and none of the real steel conversions that I liked seem to be possible to pull off with an AEG.
So with that said, I've set out to build this.

This is my first build. I'd never used a chisel or other hand tools extensively before setting out to do this, so please forgive the crudeness of the design and construction. You never learn till you start.
This is what I've got so far.
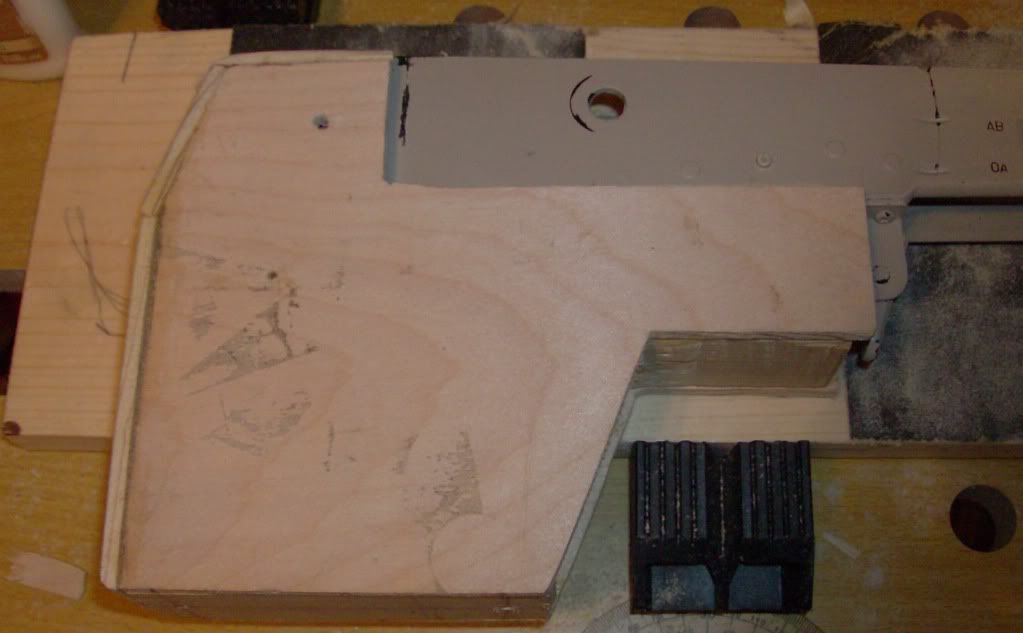
[img width=832 height=768]http://i140.photobucket.com/albums/r6/basspersonified/HPIM2655.jpg[/img]
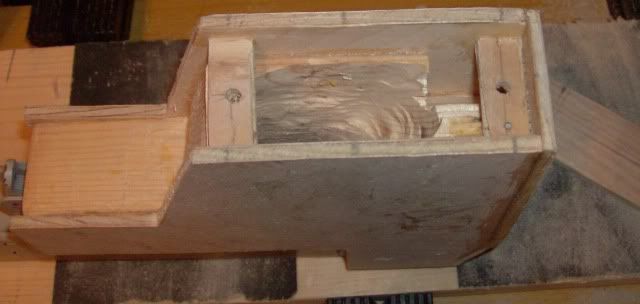
It's ugly and it's crude but it's getting there. So far the construction has consisted merely of fitting the receiver and gearbox into a scrap piece of 2x4 and then covering with 1/8 inch birch plywood. As you can see I have a few more exterior panels of plywood to install on to the 2x4 structure.
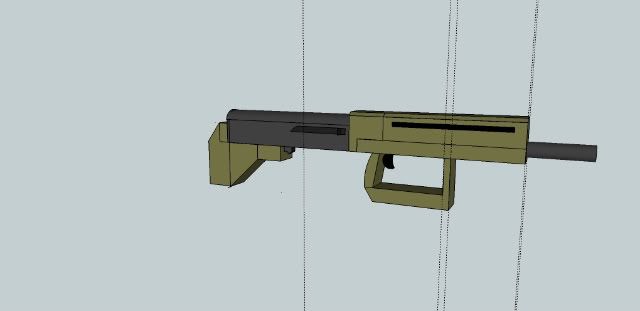
I hope to have the rear end done (built, shaped, and smoothed) in the next couple weeks. Then it will be time to move onto the front end which I'm still working on the design for. I'd like to have a better plan for the front going in then I did for the back end, which was basically flying by the seat of my pants.
The front end will of course have to include the trigger system. This will be a micro switch. This means I also have to run a MOSFET on the gun to lower the electrical load on the switch, more uncharted territory for me. The front end will also hopefully house the battery internally. I'm also the hoping the front end comes out looking less "blocky" than the concept image I've created. I will also be putting on a barrel extension to cover up the 509mm tight bore that will be installed in the gun.
My preferred medium is wood, so I will be attempting to build as much as possible using wood and wood working techniques.
The gear box also has to be rebuilt in the gun, something else I've never done before. The goal with the gearbox will simply be reliability. I'm not a high speed or high fps nut, I'm going to be looking for about 350 fps with .25g (Field limit where I play is 425 with .25)
The things I know I will need to finish are:
A rebuilt gearbox (I've heard those are pretty important)
A mosfet (to protect the new micro switch that will operate the trigger system)
Some rails
Sights or an Optic or both
A lot of wire.
More wood.
And last but not least, a zip tie (to hold the original trigger in the "fire" position").
The progress on this project will be slow for a variety of reasons.
(1) This is my first build. (2) I want to try and make sure that it is done well. (3) Financial Limitations (I get $20 a month to put toward my hobbies (I'm in college....and married.)
I'd be grateful for any comments, suggestions, tips from the more experienced builders on the forum, I'm honestly a little intimidated to post stuff along side yours.

Just please do not post something about how Mikhail Kalashnikov would not be pleased.....those come up on every bull-pup AK thread I've looked at....
-------------------------------------------------------------------------------------------------------------------------------------------
Update Posted to ASR on 3/9/11Picture Update March 9th.
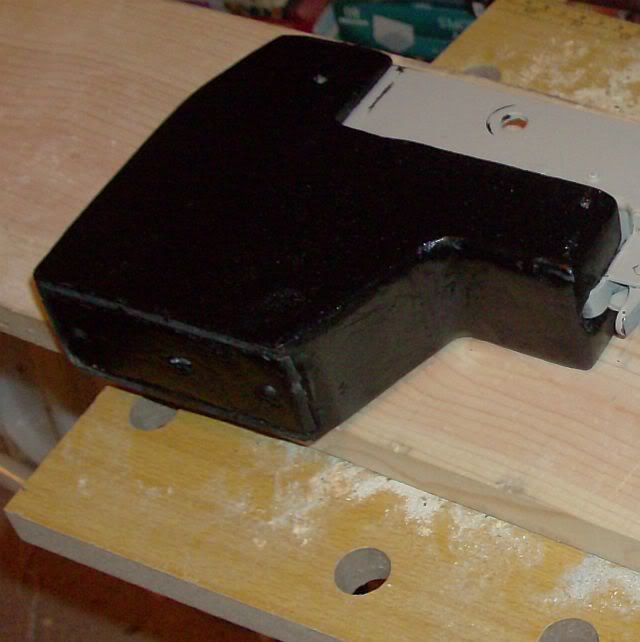
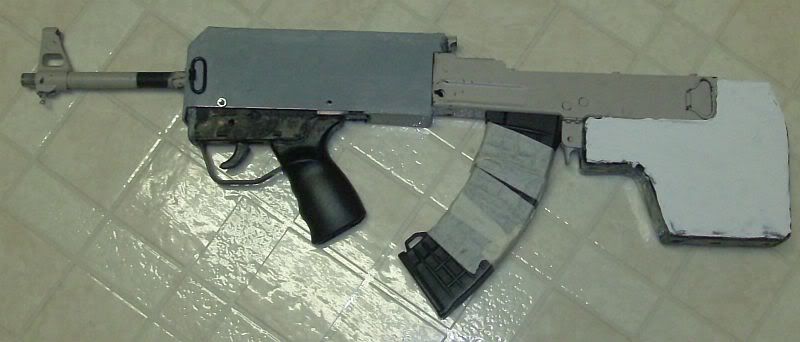
What I'm going to call the rough prototype of the rear stock is done. It's rougher than I care for now that I have it painted, so I will either re-sand/resurface/repaint later or redo the thing with less mistakes on the the way next time. However this attempt served the purpose of letting me know that the basic design of the rear end was comfortable and sound.
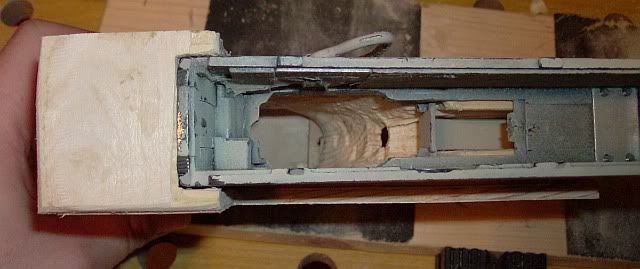
From where I had left off last time.
First I had to get the final plywood plates in place and get the screw hole for the motor screw in the bottom of the new rear stock.
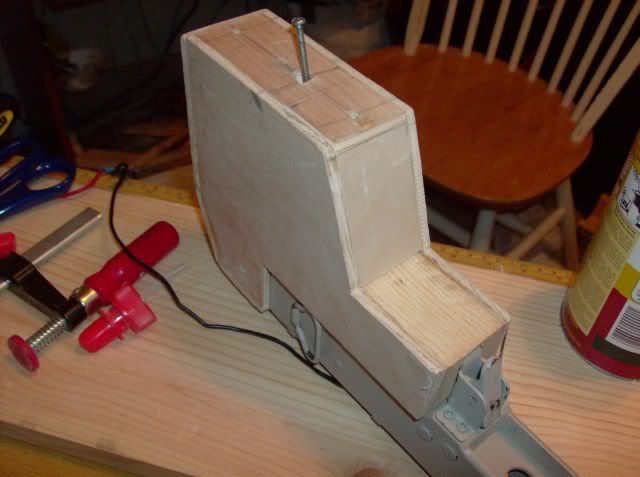
(It was a royal pain to get the motor screw angled just right)
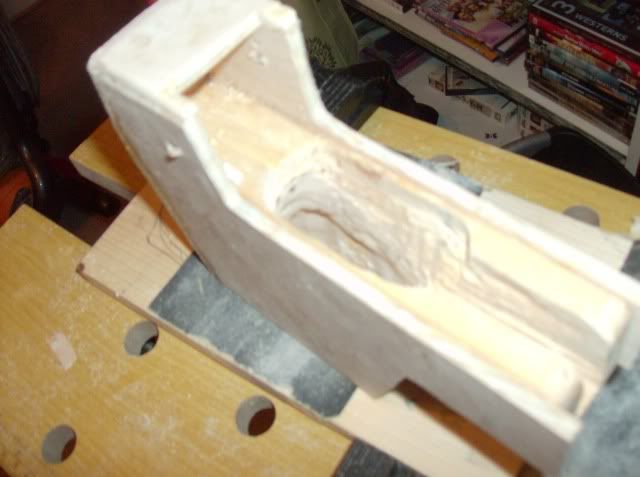
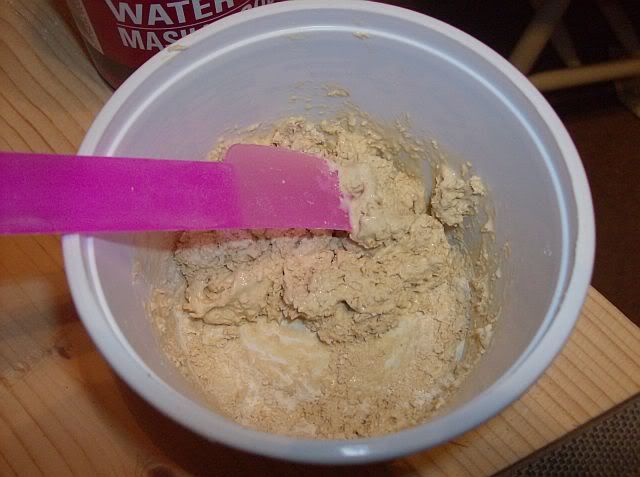
Next I mixed up a "poor man's bondo" mixture of 50/50 Durham's "Rock Hard" Water Putty and Wood Glue. This Putty would have worked great had I sanded it some more (with finer and finer grits, etc.) The putty is not really strong enough for this application when you follow the directions, but when mixed with wood glue instead of water it becomes insanely durable.
This is some random in progress picture.
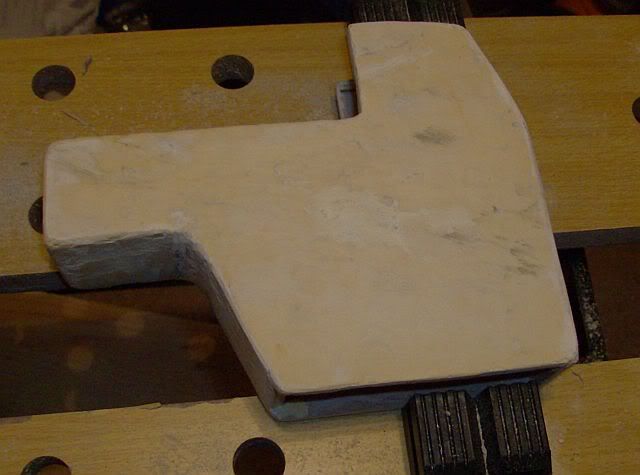
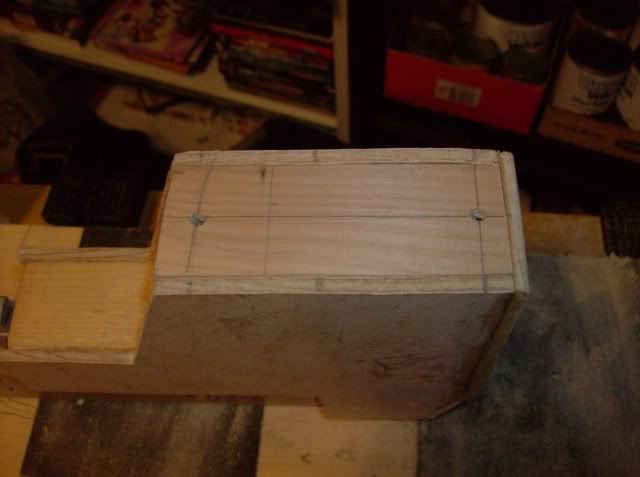
As it is now. The stock appears to be all one piece (except for the bottom plate which is removable). If I had it to do over again I would have sanded it quite a bit more, but once again that will likely come later (honestly some of the blemishes will be hidden by the final paint job, sponge painted camo ala Shwell)-Ultimately it's more import that the gun functions well as a bullpup rifle, but I would like for it to look nice also.
Enough talk on with the pictures.
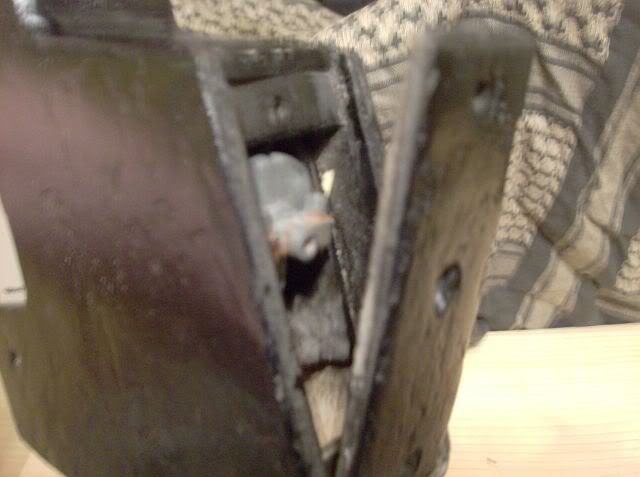
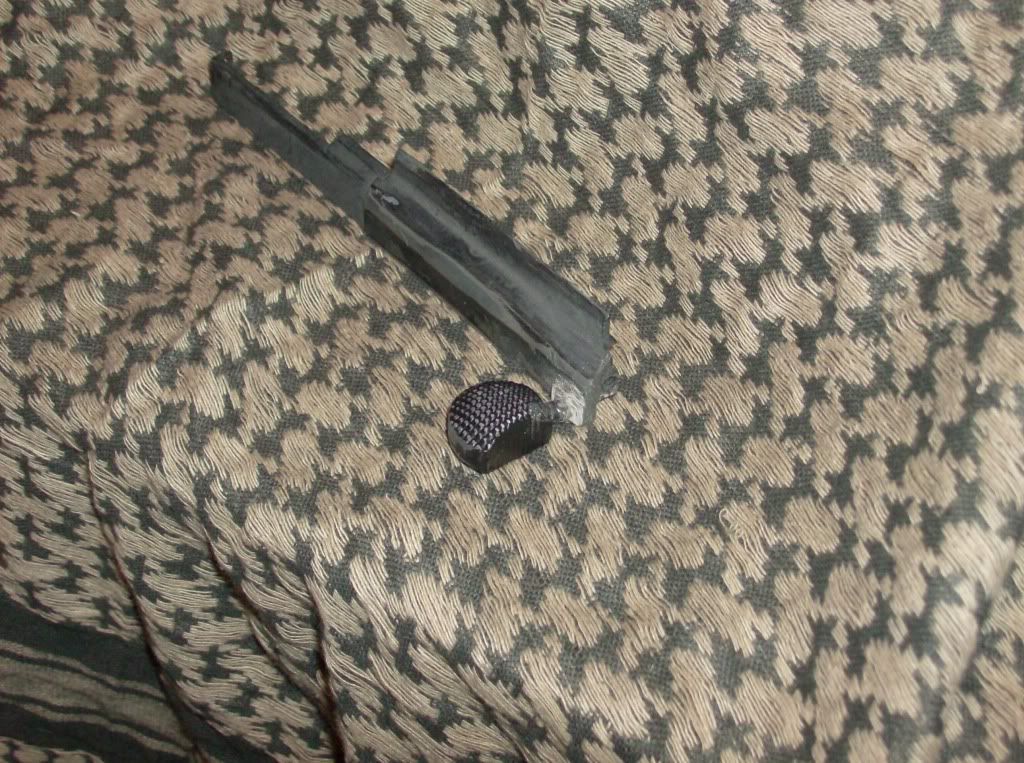
A very blurry pic of the motor cage inside the new stock with the bottom plate of the stock pulled back.
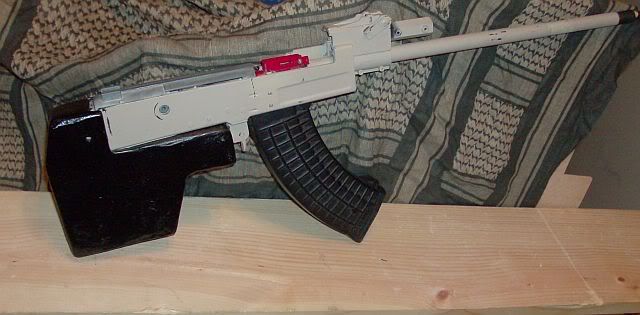
As you can see the stock is getting to a finalized form. In fact I'm going to leave it as it is till the front is done and then sand them both quite a bit more before the painting.
I'm hoping to do some lay out work on the new front end this weekend and get started next week/weekend.
Since my first post about the project the following has changed about the overall plan for the gun.
1. I'm likely to just use standard iron sights. They will work much better with the new stock than I had anticipated.
2. The barrel extension will most likely just be a mock silencer, not custom made.
3. I initially will not run a mosfet in the gun. I found a micro switch that's cheap and should handle up to a
130 amp surge from a 9.6v battery.
I'm still up for all the advice,comments (constructive) and suggestions I can get.


