Okay, in this thread I'll be chronicling my (mis)adventures as I build my M4 challenge kit. If you are thinking about buying this kit, be forewarned: this kit is EVIL to those like me who are plagued with sudden inexplicable bouts of loss of fine muscle control in the fingers. That said, it's not impossible - I believe there are only two parts that have eluded my ability to assemble - the hammer, which on mine the tolerances on the outer buffer parts are off and when assembled binds the hammer from turning freely, and the E-clip that holds the nozzle to the bolt carrier, which fell off into my shoe and disappeared (yeah, I couldn't believe it either).
Before you begin, I'd suggest working on a fold-out table placed on top of a bedsheet laid out over the ground to avoid losing parts when dropped. I didn't, and now I'm paying for it.
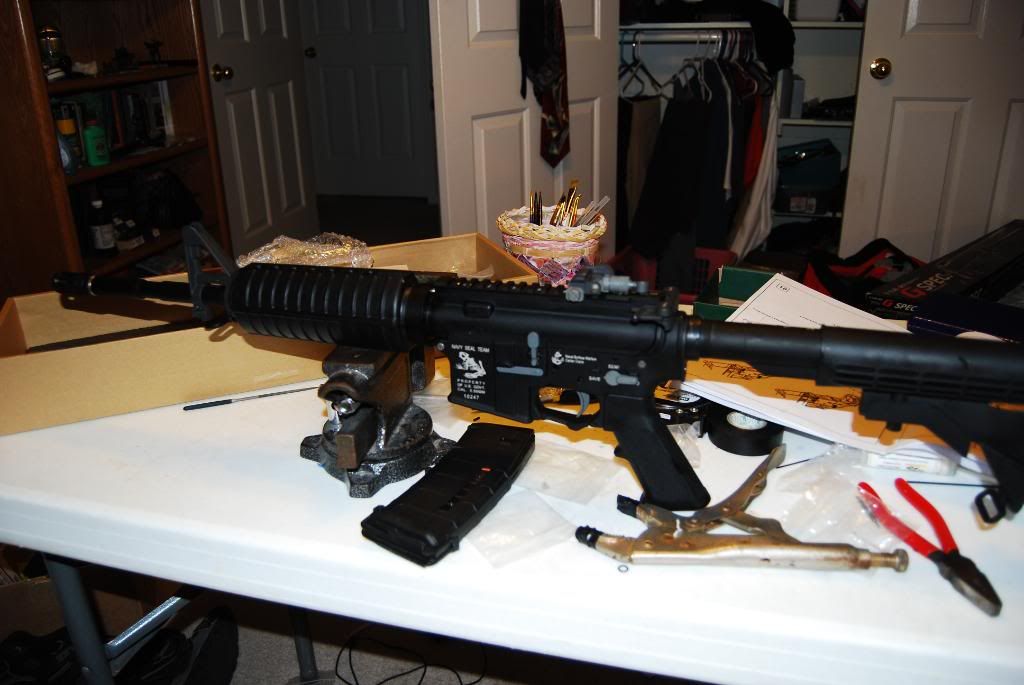
So far, I've needed pliers, roll pin punches (I got around that - I'll explain), files, allen wrenches, and a phillips head screwdriver. I found it useful to have a nylon paintbrush for use as a punch when I don't want to mar the finish on larger pieces, and a hobby knife.
I got around having to use the punches by using a pair of visegrips with the teeth wrapped in a couple of layers of electrical tape. Open the jaws wide enough to fit around both the part and pin when closed using the bolt at the bottom, then open, tighten the bolt 1/4-1/2 turn, close. Wash, rinse, repeat. I learned that method doing my real AR15 lower (amusingly, the tape on the wrench I used is the exact same stuff I used when I assembled that). This method is also detailed further on AR15.com (where I originally learned about this method).
The first thing I did after I unwrapped the body was to find something to pound out the takedown pins holding the upper and lower receivers together. I'm not sure if they were anodized poorly or what, but the finish on both the pins and the body pieces was such that they bound pretty furiously. After I managed to get them apart, I took some of my favorite RS grease - MILCOMM TW25B - and applied some sparingly to the length of the pins, and in the channel for the retaining detents (if you do this, make sure you spread the stuff out with your finger, and easy does it - its lubricating properties are amazing). Push the pins in and out a couple of times to distribute the grease and to make sure you got enough.
Assembling the lower is pretty close to an AR15, so I'm going to glaze over installing the trigger, except I'm going to stress that you DO NOT FORGET THE DISCONNECT SPRING (I'm not sure it is called that on the M4, but I know it as the RS part). You will fire full auto on semi, and only sporadically at that as the recoil will bounce that part up and down, causing it to catch randomly. You can find a plethora of videos detailing how to assemble the real steel, which is really bloody close to the WA.
I still haven't installed my hammer, as I've elected to buy a new one that should be arriving in a few days, so I'm going to skip that, but I will say that if you use the stock one, the correct order for assembly is outer bushing->inner bushing->retaining washer->inner bushing->outer bushing. I tried pressing the inner bushings in with a wood vise - it is a royal pain to disassemble once they're in. I also had serious problems with getting the retaining washer to move appropriately to allow the retaining pin to fit through it (turns out there is a small cavity on other hammer bushings intended to alleviate this problem - when I go home tonight I'm going to experiment with countersinking one of the inner bushings on mine).
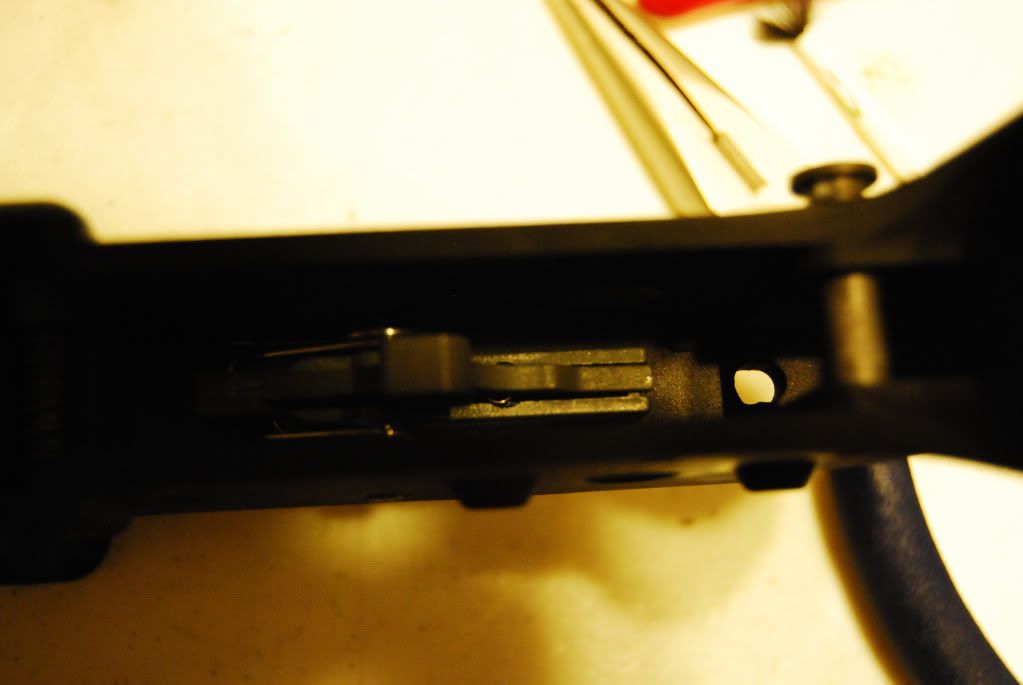
I skipped ahead and went on to install the selector and the auto sear. I found it easiest to install the auto sear, then the body retainer (really, the whole thing was a fustercluck, because I had started with the selector installed already, and the body block already in; I had to partially disassemble the block to get everything in correctly). I used a hobby knife to tension the spring from the side the selector does not go in from, then passed the selector partially through. Because of my unique situation, I had to stop to reinstall the selector spring and detent, then I pushed the selector all the way in.
If you have everything installed, congratulations! Do a function check, then move on to installing the bolt. Evike provided an updated diagram of the improved bolt, so that's how the assemblies go in, but we'll get to that in a moment. Put the roll pin halfway into the small piece (part_-_) and hook the long spring around it. Finish pressing the pin in using your visegrips, then tie a piece of thread to the other end of the spring. Thread it through part _-_, then tension it so that you can pass the roll pin through the loop in the center of the part (this is how I did it; you may have a different method that works just as well). Put your o-rings on. Assemble your nozzle as per the updated diagram.
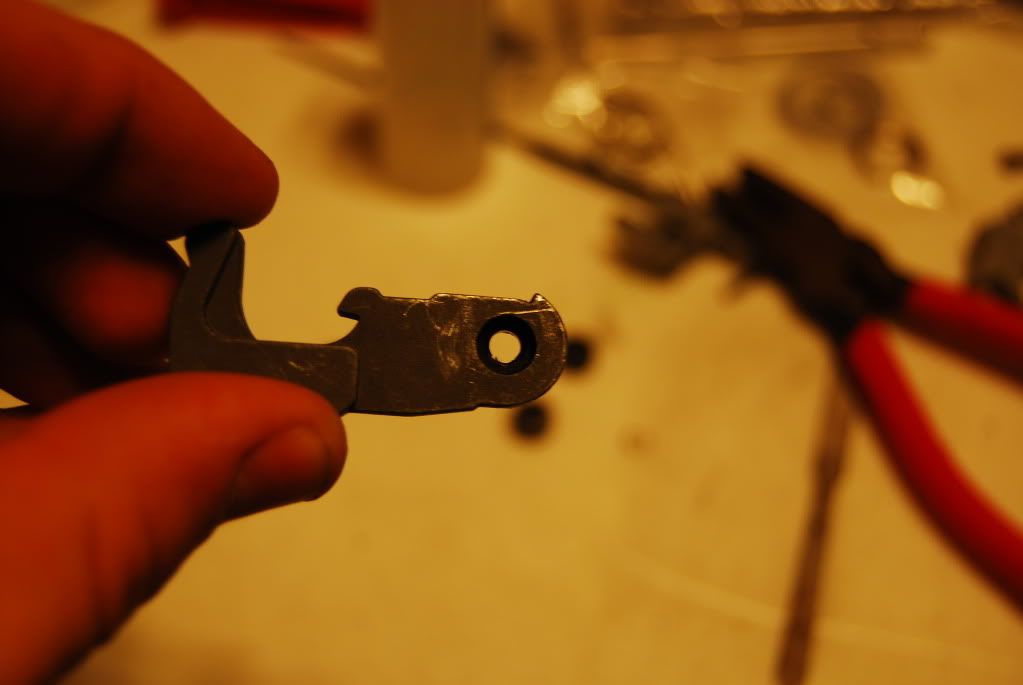
Oil up your o-rings, and assemble the bolt carrier as per the instructions. BE CAREFUL WITH THE E-CLIP. It fell into my shoe, and I have yet to find it hours later (as such I need to find a replacement).
This is as far as I've gotten. I'll update this post once I get home to get part numbers, and I'll reply with photos as they're all on my camera at home and with more information as I continue to build. Hope what I have helps.
TN Airsoft Forums
Airsoft forum dedicated to promoting collaboration among active Airsoft enthusiasts within the TN area.
G&P M4A1 Challenge Kit Thread
Moderators: dogsoldier, Skidude, Sniper
Re: G&P M4A1 Challenge Kit Thread
![]() by Fluffy Boy 32 » Tue Aug 16, 2011 11:10 am
by Fluffy Boy 32 » Tue Aug 16, 2011 11:10 am
Interested to see the pictures.
Estimate of how long it took to build?
Level of tech work experience needed to complete this?
Estimate of how long it took to build?
Level of tech work experience needed to complete this?
Armory:
-PolarStar'd VFC 635 w/ R-Hop
-KWA USP Compact
-Custom Zombie Killer KJW 1911

-PolarStar'd VFC 635 w/ R-Hop
-KWA USP Compact
-Custom Zombie Killer KJW 1911
-

Fluffy Boy 32 - Posts: 1518
- Joined: Tue Jan 26, 2010 9:47 pm
- Location: Tennessee
Re: G&P M4A1 Challenge Kit Thread
![]() by vulrath » Tue Aug 16, 2011 11:50 am
by vulrath » Tue Aug 16, 2011 11:50 am
Still building - had to stop to get sleep, but I've spent about 3 hours on it so far (most of that was trying to figure out the hammer assembly). Other than installing the hammer, I just need to finish assembling the different parts of the upper and fit them together, and get a replacement E-clip for the bolt carrier/nozzle.
I'd say this ranks at medium-high tech knowledge (worked on some AEGs, have a decent grasp on how to do stuff, know how and when to improvise; having built real steel ARs is extremely helpful too) to build. Largely it's not hard to assemble; the instructions are just crap and there's a lot of small parts to lose.
I'd say this ranks at medium-high tech knowledge (worked on some AEGs, have a decent grasp on how to do stuff, know how and when to improvise; having built real steel ARs is extremely helpful too) to build. Largely it's not hard to assemble; the instructions are just crap and there's a lot of small parts to lose.
-

vulrath - Posts: 2400
- Joined: Sun May 20, 2007 11:03 pm
- Location: Memphis
Re: G&P M4A1 Challenge Kit Thread
![]() by Fluffy Boy 32 » Tue Aug 16, 2011 12:29 pm
by Fluffy Boy 32 » Tue Aug 16, 2011 12:29 pm
Armory:
-PolarStar'd VFC 635 w/ R-Hop
-KWA USP Compact
-Custom Zombie Killer KJW 1911
-PolarStar'd VFC 635 w/ R-Hop
-KWA USP Compact
-Custom Zombie Killer KJW 1911
-
Fluffy Boy 32 - Posts: 1518
- Joined: Tue Jan 26, 2010 9:47 pm
- Location: Tennessee
Re: G&P M4A1 Challenge Kit Thread
![]() by vulrath » Tue Aug 16, 2011 12:34 pm
by vulrath » Tue Aug 16, 2011 12:34 pm
It comes with a bound manual of diagrams. You may have to get a bit creative with the order that you use, but they're there. I'll upload a few photos of it when I put the other ones up.
-
vulrath - Posts: 2400
- Joined: Sun May 20, 2007 11:03 pm
- Location: Memphis
Re: G&P M4A1 Challenge Kit Thread
![]() by Aegis » Tue Aug 16, 2011 7:04 pm
by Aegis » Tue Aug 16, 2011 7:04 pm
As I patiently await my own to arrive in the mail, I will be looking through your topic to gain a heads up. So far, I have the tools you mention needing. My only worry is that I don't have any experience with a real M4 as you say it could help. Other than that, I'm actually looking forward to creating my own gun.
- Aegis
- Posts: 90
- Joined: Fri Jun 04, 2010 11:12 am
Re: G&P M4A1 Challenge Kit Thread
![]() by vulrath » Tue Aug 16, 2011 10:43 pm
by vulrath » Tue Aug 16, 2011 10:43 pm
I built my AR lower based on instructions from here: .
Okay...I assembled the upper tonight. Unfortunately, in my overly exhausted state (I went on vacation, and all I got was this lousy cold) I neglected to take photos chronicling my further (mis)adventures, but I do have the tricks I learned.
First off, the hop up is a bitch to assemble. I used video to assemble it.
I had a hell of a time assembling the delta ring - I had to press the retaining ring in a vise and stretch it open to get it on the barrel nut, and then I had to fight to get the hole for the gas tube to line up with the hole in the upper receiver.
I learned the hard way to oil the bolt carrier (yes, I'm a moron sometimes) - I had to unscrew the stock to get the bolt out. Don't make the same mistake I did.
Overall, I would have to say that I'm impressed with the diagrams in the manual. It's surprisingly detailed, if the order in which you need to do stuff is a bit off.
And now, pictures!
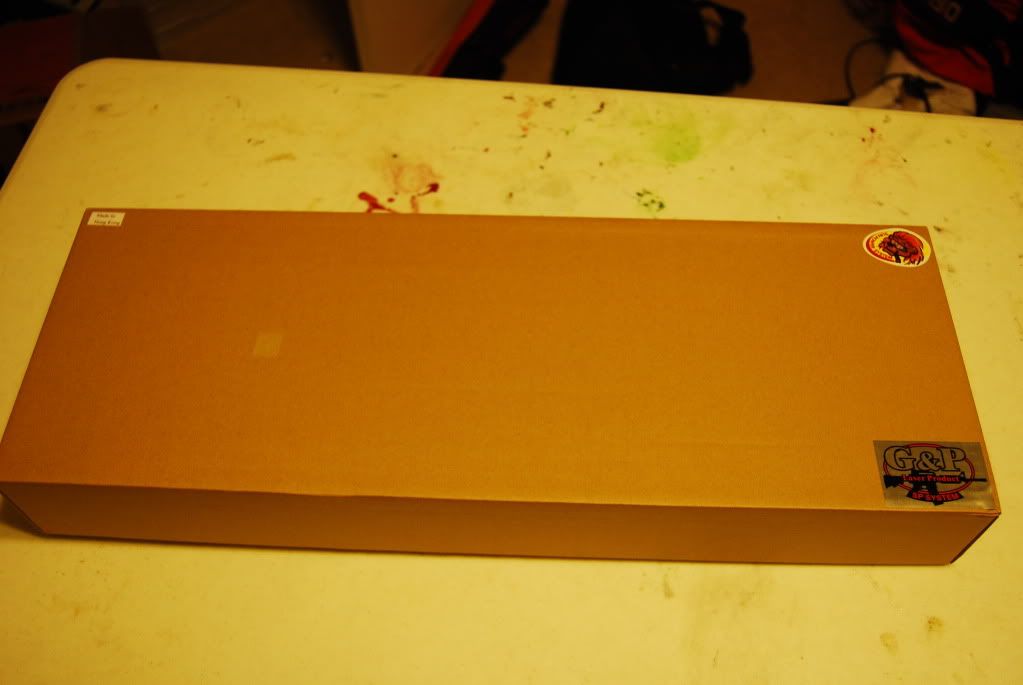
unboxing 1
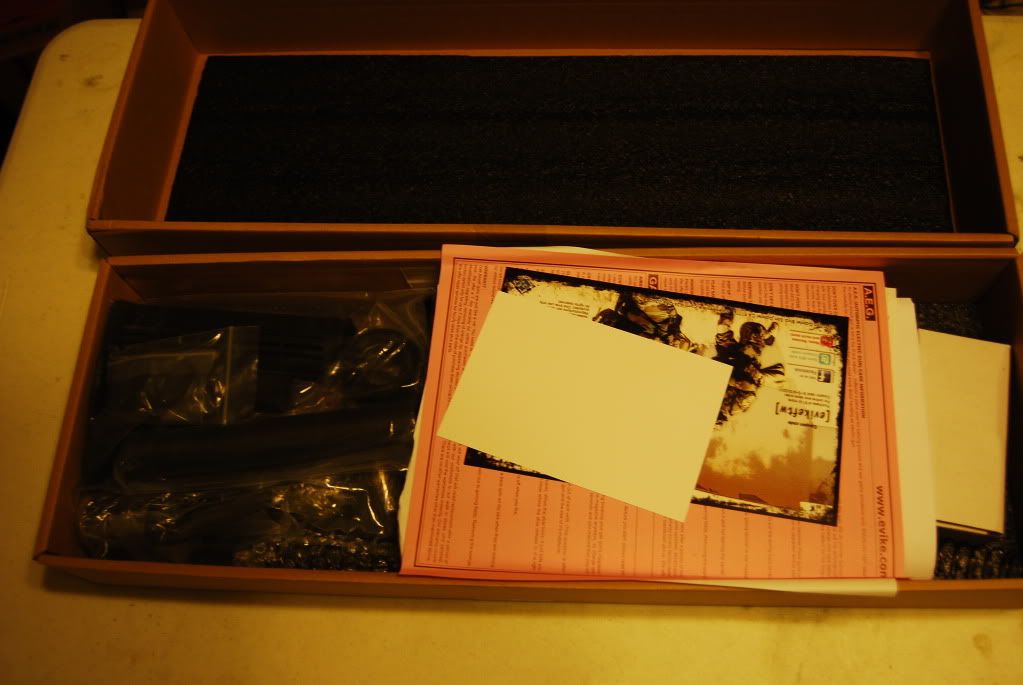
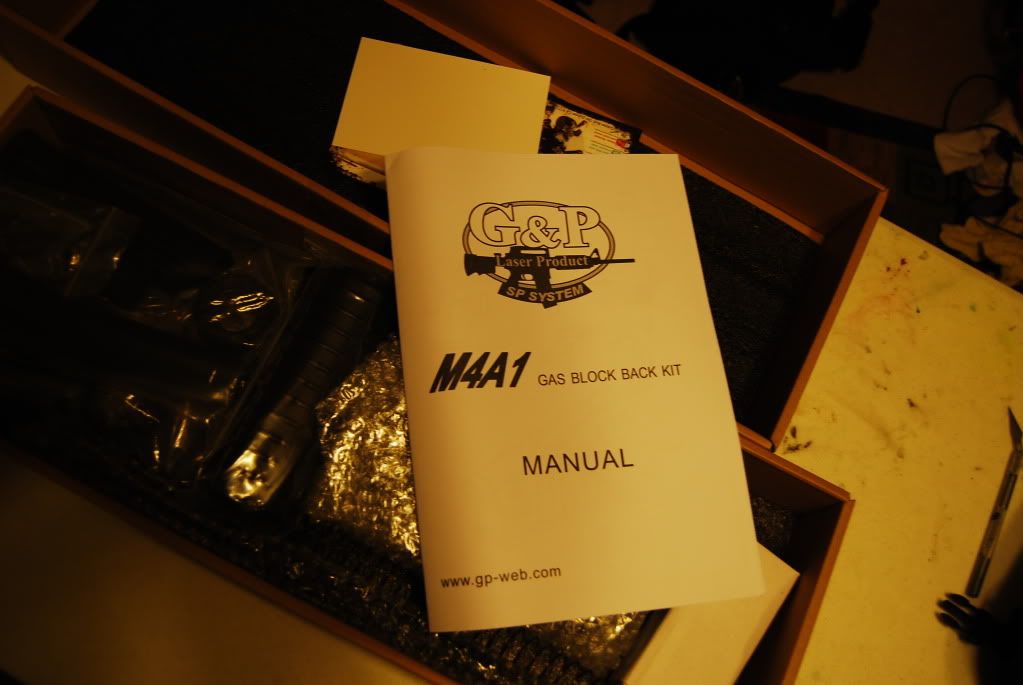
unboxing 2
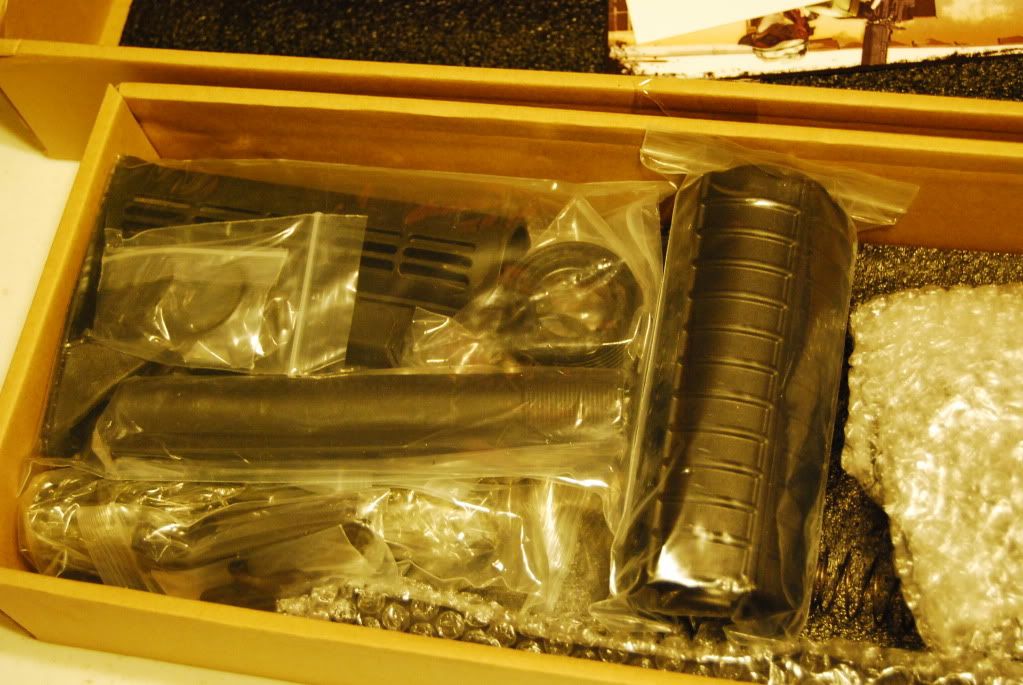
unboxing 3
unboxing 4
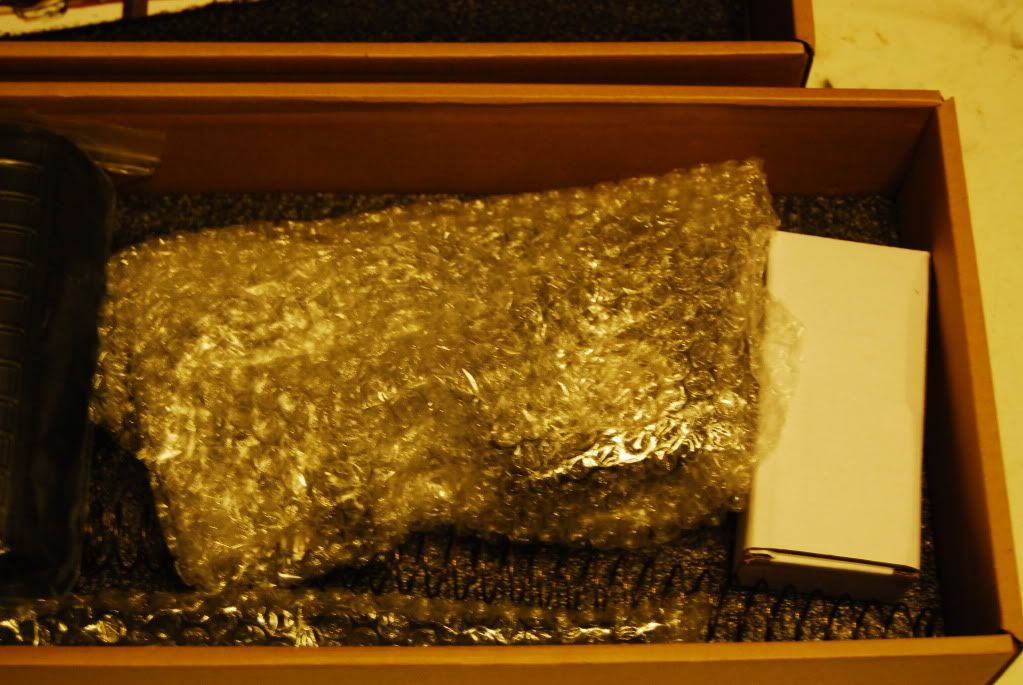
the receivers are well-packaged
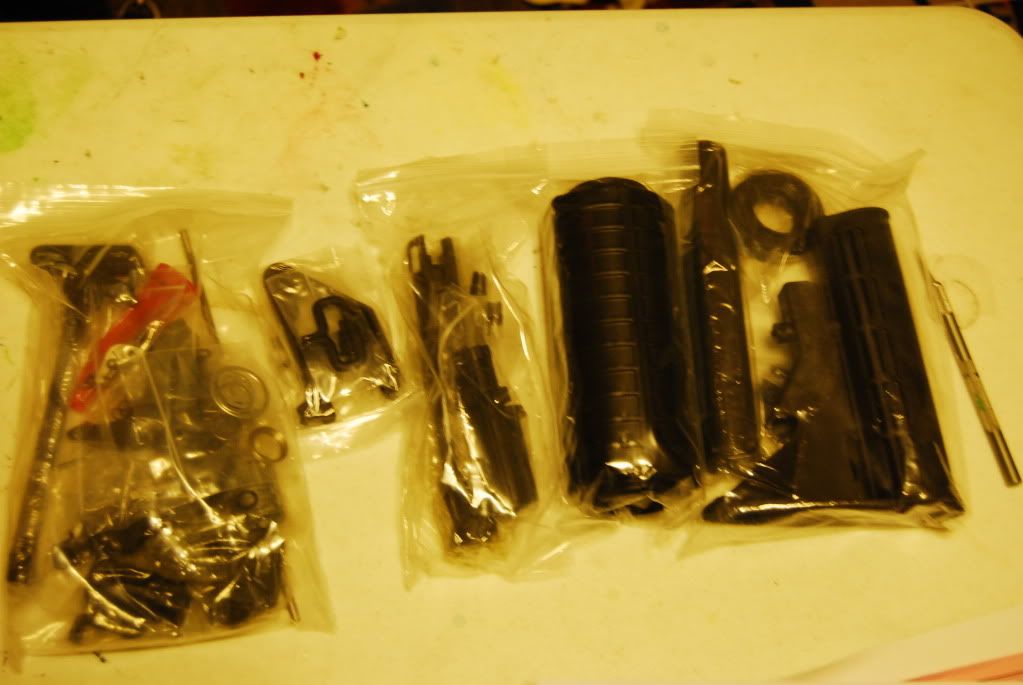
parts
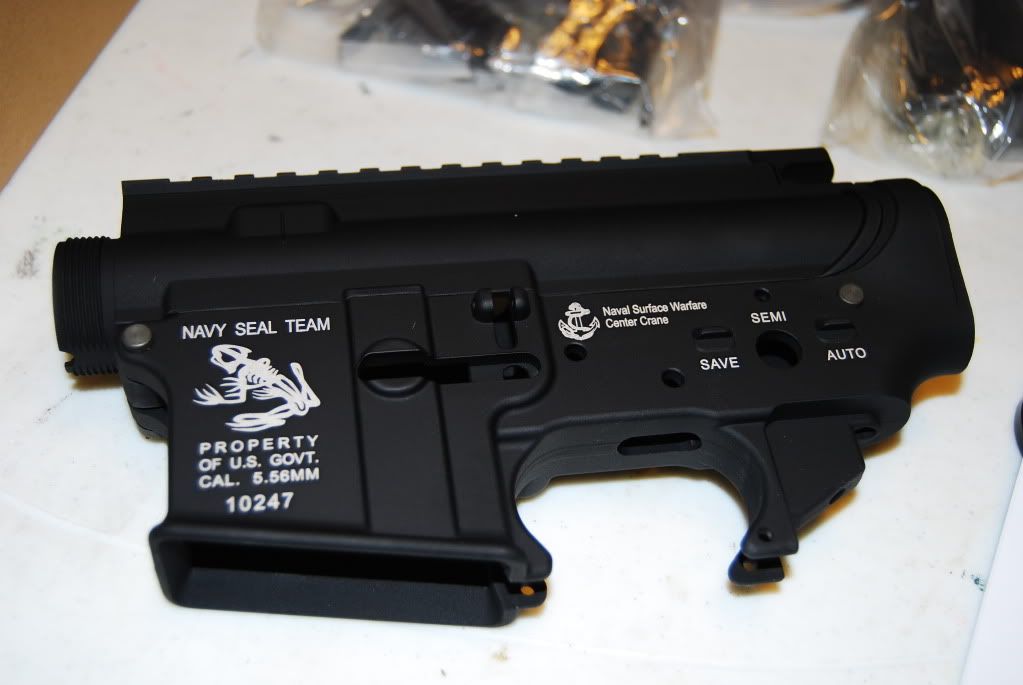
body shots 1
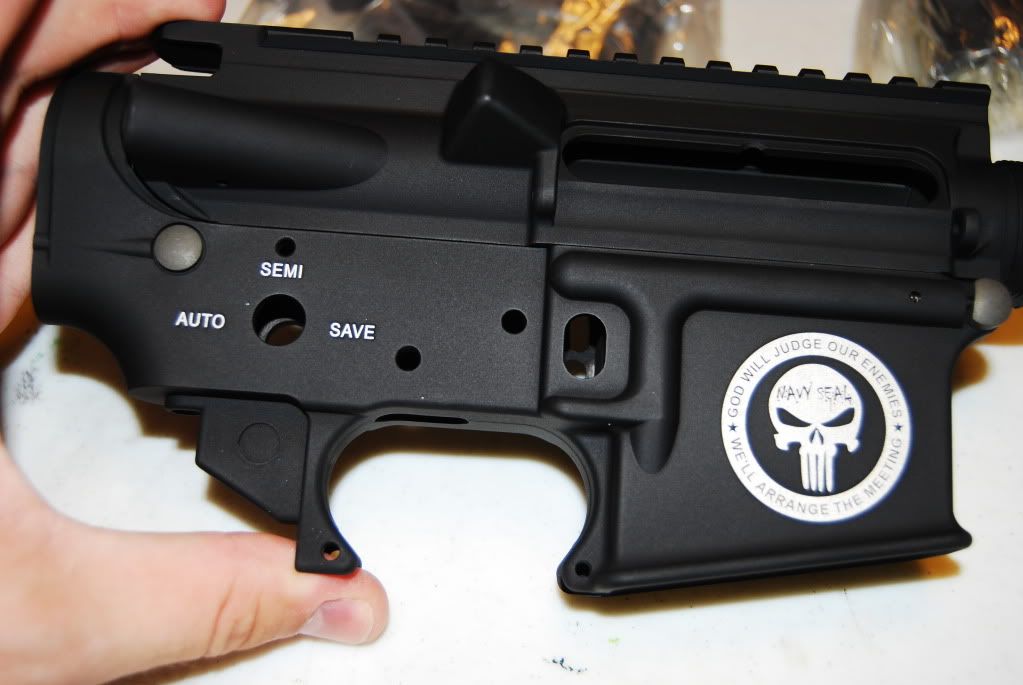
body shots 2
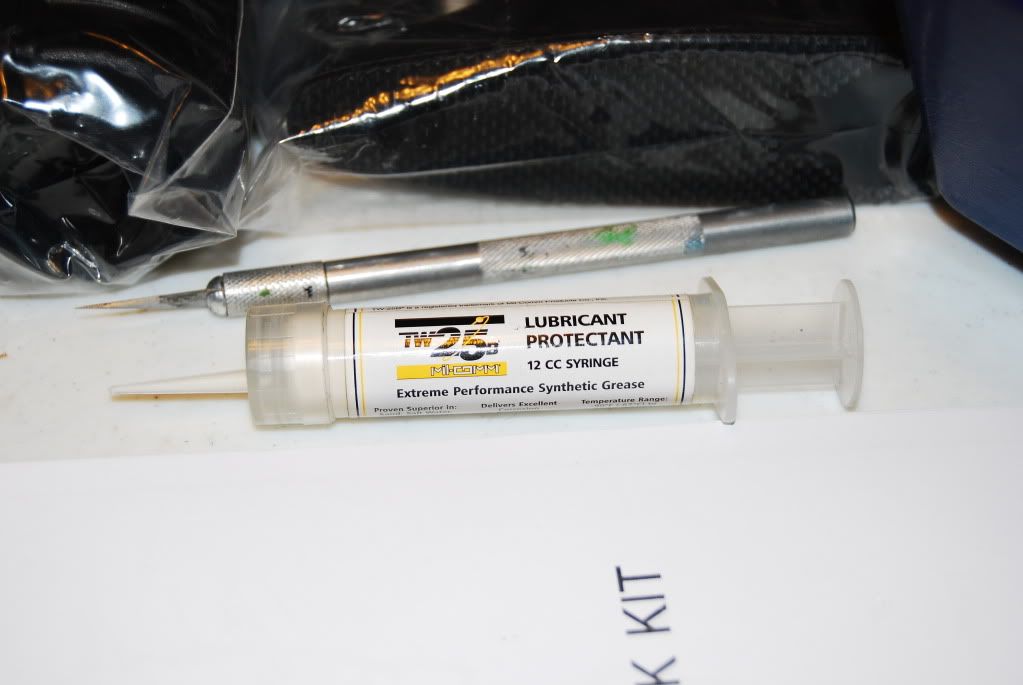
TW25B - some of the best stuff I've used for metal-to-metal lubrication
the trigger installed
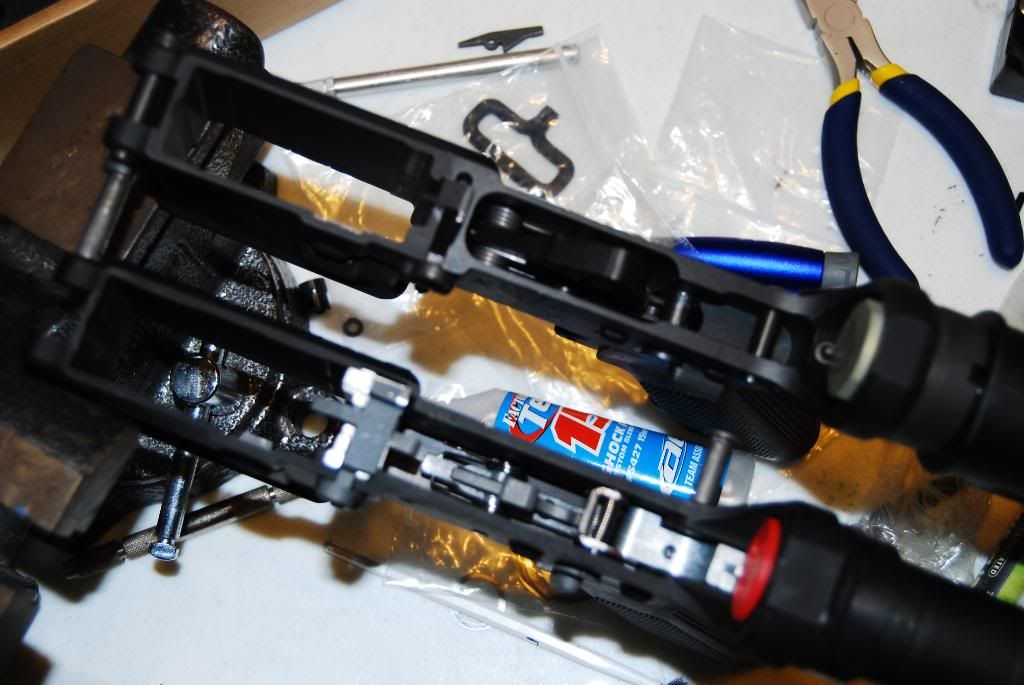
The hammer, mid-assembly
Due to a stupid design you have to remove the outer barrel to adjust the hop up, so I'll have plenty of chances to get shots of the barrel disassembly/reassembly procedures.
Okay...I assembled the upper tonight. Unfortunately, in my overly exhausted state (I went on vacation, and all I got was this lousy cold) I neglected to take photos chronicling my further (mis)adventures, but I do have the tricks I learned.
First off, the hop up is a bitch to assemble. I used video to assemble it.
I had a hell of a time assembling the delta ring - I had to press the retaining ring in a vise and stretch it open to get it on the barrel nut, and then I had to fight to get the hole for the gas tube to line up with the hole in the upper receiver.
I learned the hard way to oil the bolt carrier (yes, I'm a moron sometimes) - I had to unscrew the stock to get the bolt out. Don't make the same mistake I did.
Overall, I would have to say that I'm impressed with the diagrams in the manual. It's surprisingly detailed, if the order in which you need to do stuff is a bit off.
And now, pictures!
unboxing 1
unboxing 2
unboxing 3
unboxing 4
the receivers are well-packaged
parts
body shots 1
body shots 2
TW25B - some of the best stuff I've used for metal-to-metal lubrication
the trigger installed
The hammer, mid-assembly
Due to a stupid design you have to remove the outer barrel to adjust the hop up, so I'll have plenty of chances to get shots of the barrel disassembly/reassembly procedures.
-
vulrath - Posts: 2400
- Joined: Sun May 20, 2007 11:03 pm
- Location: Memphis
Re: G&P M4A1 Challenge Kit Thread
![]() by Fluffy Boy 32 » Tue Aug 16, 2011 11:34 pm
by Fluffy Boy 32 » Tue Aug 16, 2011 11:34 pm
Got bored and did a little poking around on YouTube and found this:
G&P are almost exactly the same so you shouldn't have any problems following this guys series of videos...
Another lubricant you could give a look at is super lube. Works great for just about anything.
Found out that these challenge kits are the WOC-X series (basically the sport line for the AEG companies).
The internals are aluminum instead of steel which is found in the regular WOC series(making it cheaper).
You can buy the WOC-X's assembled for about $250 but with import shipping, it'll run the price up some but maybe from the pure frustration I'll have, this would be better...
Armory:
-PolarStar'd VFC 635 w/ R-Hop
-KWA USP Compact
-Custom Zombie Killer KJW 1911
-PolarStar'd VFC 635 w/ R-Hop
-KWA USP Compact
-Custom Zombie Killer KJW 1911
-
Fluffy Boy 32 - Posts: 1518
- Joined: Tue Jan 26, 2010 9:47 pm
- Location: Tennessee
Re: G&P M4A1 Challenge Kit Thread
![]() by vulrath » Tue Aug 16, 2011 11:54 pm
by vulrath » Tue Aug 16, 2011 11:54 pm
Yup, watched that one. Unfortunately, that guy was only moving from one body to another, and making a few minor upgrades as he went. Largely helpful, but on details it's not much help.
Fun fact: WOC actually stands for "WA Official Custom". It isn't almost exactly the same - it IS the same, only in metal.
Yup, they're WOC-X. While it's aluminum, it's G&P aluminum, which is much better quality than other off-brand stuff. That said, it will give out long before steel will, so you will have to replace it sooner or later. I plan on replacing internals with a G&P steel burst kit when this stuff breaks (or whenever I get the cash, depending on whether I can get this hammer installed properly or not).
-
vulrath - Posts: 2400
- Joined: Sun May 20, 2007 11:03 pm
- Location: Memphis
Re: G&P M4A1 Challenge Kit Thread
![]() by Aegis » Wed Aug 17, 2011 5:35 pm
by Aegis » Wed Aug 17, 2011 5:35 pm
- Aegis
- Posts: 90
- Joined: Fri Jun 04, 2010 11:12 am
Re: G&P M4A1 Challenge Kit Thread
![]() by vulrath » Wed Aug 17, 2011 6:01 pm
by vulrath » Wed Aug 17, 2011 6:01 pm
Just for stuff and giggles, I took photos of the lower next to my real AR15 receiver.
Here's the finished (sort of) product.
Here's the finished (sort of) product.
-
vulrath - Posts: 2400
- Joined: Sun May 20, 2007 11:03 pm
- Location: Memphis
Re: G&P M4A1 Challenge Kit Thread
![]() by Fluffy Boy 32 » Wed Aug 17, 2011 7:09 pm
by Fluffy Boy 32 » Wed Aug 17, 2011 7:09 pm
So what do you think?
Get the challenge kit and build it yourself or pay the extra $50+overseas shipping and save yourself the frustration (You get a rail and magazine if that matters)?
Get the challenge kit and build it yourself or pay the extra $50+overseas shipping and save yourself the frustration (You get a rail and magazine if that matters)?
Armory:
-PolarStar'd VFC 635 w/ R-Hop
-KWA USP Compact
-Custom Zombie Killer KJW 1911
-PolarStar'd VFC 635 w/ R-Hop
-KWA USP Compact
-Custom Zombie Killer KJW 1911
-
Fluffy Boy 32 - Posts: 1518
- Joined: Tue Jan 26, 2010 9:47 pm
- Location: Tennessee
Re: G&P M4A1 Challenge Kit Thread
![]() by vulrath » Wed Aug 17, 2011 7:29 pm
by vulrath » Wed Aug 17, 2011 7:29 pm
Overall, I'm satisfied. The only thing I don't ever really want to do again is the hop up chamber - everything else is fine. Rails don't interest me. The magazine, though...That might have swayed me, depending on shipping costs.
One thing that I neglected to mention last night is that anyone using a WA-based system regardless of whether would do well to buy a delta ring tool. In a moment of utter stupidity, they made it so that you have to take the outer barrel off to adjust the hop up.
One thing that I neglected to mention last night is that anyone using a WA-based system regardless of whether would do well to buy a delta ring tool. In a moment of utter stupidity, they made it so that you have to take the outer barrel off to adjust the hop up.
-
vulrath - Posts: 2400
- Joined: Sun May 20, 2007 11:03 pm
- Location: Memphis
Re: G&P M4A1 Challenge Kit Thread
![]() by Aegis » Wed Aug 17, 2011 8:27 pm
by Aegis » Wed Aug 17, 2011 8:27 pm
Someone not interested in rails? Allow me to utter the flattest what I can offer.
What.
What.
- Aegis
- Posts: 90
- Joined: Fri Jun 04, 2010 11:12 am
Re: G&P M4A1 Challenge Kit Thread
![]() by Fluffy Boy 32 » Thu Aug 18, 2011 12:14 am
by Fluffy Boy 32 » Thu Aug 18, 2011 12:14 am
Armory:
-PolarStar'd VFC 635 w/ R-Hop
-KWA USP Compact
-Custom Zombie Killer KJW 1911
-PolarStar'd VFC 635 w/ R-Hop
-KWA USP Compact
-Custom Zombie Killer KJW 1911
-
Fluffy Boy 32 - Posts: 1518
- Joined: Tue Jan 26, 2010 9:47 pm
- Location: Tennessee
Who is online
Users browsing this forum: Google [Bot] and 6 guests